In office 365, there is a service called as the Azure Active Directory or better know as Azure AD. It is an integral part of Office 365. It is a free service available on each and every tenant. Azure AD is the identity store of the MS cloud. It is the Active Directory that these servers are hooked into for the identity needs. Azure AD is very different from the on-premises AD. Both of these manage the users, groups and contacts, but there is no concept of OU (Organizational Units) in Azure AD. It is a flat hierarchy. But with the concept of Azure Active Directory Domain Services (Azure AD DS), machine objects came into picture, where the Azure machines can be attached to the domain. Here the Azure level Domains become the container to hold resources related to Azure. But these Azure VMs cannot be connected to the Domains present or created on on-premises AD.
b> Synchronized Identities - Here, the on-premises AD is the master of the identities. There is a service that would run regularly which would push the on-premises user data to Azure AD. All changes that are made in on-premises are synchronized properly on the Azure AD using Azure AD connect. This synchronization can include passwords. Technically, password hashes are synchronized and not the passwords stored in on-premises AD. If password hashes are chosen to for synchronization, then the end users can log into the office 365 using the same password as they log into on-premises. This is also called as SAME-SIGN-ON.
Now coming to the identities, that are being taken care in Office 365, are as follows -
a> Cloud-Only Identities - they are the simplest identity scenario, where all the user identities are stored on Office 365. Once can go to the Office 365 Admin Center, select Active Users and then add them manually one by one or import multiple users using CSV files as shown in the screenshot below.
b> Synchronized Identities - Here, the on-premises AD is the master of the identities. There is a service that would run regularly which would push the on-premises user data to Azure AD. All changes that are made in on-premises are synchronized properly on the Azure AD using Azure AD connect. This synchronization can include passwords. Technically, password hashes are synchronized and not the passwords stored in on-premises AD. If password hashes are chosen to for synchronization, then the end users can log into the office 365 using the same password as they log into on-premises. This is also called as SAME-SIGN-ON.
c> Federated Identities - We will talk about this bit later in the next post.
As we are aware and confident on the 1st option, we can skip this. Now, coming to synchronized identities, I share the high level steps which I performed to implement the same. Here in the below mentioned steps, I am not implementing the password synchronization part. here we will be synchronizing the users from on-premises AD to Azure AD.
The pre-requisites for this implementation is, one should have an O365 subscription. The account used to log in is the global administrator. I have utilized Amazon AWS Windows VM for the same. I have my Server Admin user name and password ready.
so, let's start from scratch -
1> Create a VM and enable the AD related roles and features as shown in the screenshot below as we will be creating an Active Directory/Domain Controller out of it.
2>Once the roles and features are installed, went ahead and created a new forest to which the server was attached to. Please note that the Office 365 subscription one has .onmicrosoft.com, a same domain is advisable while creating the new domain on this step.
3> Once the domain is created and the server associated, go ahead and create test users as shown in the screenshot below.
4> Coming to the Office 365, there is a need to install Azure AD Connect Tool on the server (on-premises Domain Controller or AD), which will connect the server to Azure AD. The Azure AD Connect tool can be installed from the link
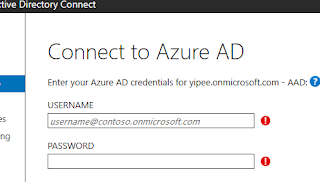
5> For the user synchronization to happen, we can select the express settings but for password synchronization, we need to select the Custom Settings while configuring the Azure AD Connect tool. In the Connect to Azure AD Section, we need to provide the O365 Global admin credentials.
6> Once done, it will ask for to Connect to the Directories. Here, provide the credentials of the server administrator used to access the VM that was created in step 1. Once done, it will connect to the AD.
7> In the next steps, it will ask about the domains. There will be a default domain linked to onmicrosoft.com. The other domain, that needs to be added is the .com domain. Once, added the next steps follow.
8> In the following steps, it will install and automatically take care of the configurations of the Azure AD Connect tool. Once done, it will automatically do the synchronization.
9> In the Active users in the O365 Admin Center, please refresh and will find the test users that were created in on-premises AD will be reflected there as shown in the screenshot below. The sync type mentions if its synched from on-premises AD or not.
I hope I gave a clear idea on the synchronization aspect and also the steps to be performed for this to work properly.


